Master the Ultimate Crispy Beer Roast Turkey Recipe: Juicy Perfection, Every Time
For many, the thought of roasting a turkey conjures images of dry, bland meat and disappointing, flabby skin. But what if there was a simple, yet revolutionary, method to guarantee a bird that's incredibly juicy on the inside with a shatteringly crisp, golden-brown exterior? Enter the crispy beer roast turkey recipe – a game-changer that transforms a traditional centerpiece into an unforgettable culinary experience.
This comprehensive guide will walk you through the art and science of beer brining and high-heat roasting, ensuring your next turkey is nothing short of spectacular. Forget your turkey traumas; this method is designed for success, simplifying the process and delivering a delicious result that will impress even the most discerning guests. You'll soon understand why the secret lies in a dynamic duo: beer and high heat.
Why Beer Brining is Your Turkey Game Changer
The traditional turkey often falls short in the flavor and moisture departments. Brining itself is a well-known technique to combat dryness, but incorporating beer elevates this process to a whole new level. A beer brine doesn't just add moisture; it infuses the meat with a subtle complexity, a hint of malt sweetness, and a richness that water alone simply cannot achieve. This is more than just a technique; it's a transformation.
The Science Behind the Brine: How Beer Works Its Magic
At its core, brining is the process of soaking meat in a salt solution. This helps the turkey absorb moisture through osmosis, and the salt denatures some of the protein structure, allowing the muscle fibers to retain more liquid during cooking. When beer is introduced, the magic truly begins:
- Moisture Retention & Tenderization: The beer's liquid contributes directly to the overall moisture content, while its enzymes and mild acidity can help tenderize the meat. This ensures a remarkably juicy interior that stays moist even after high-heat roasting.
- Flavor Infusion: Beer, particularly a lager or light ale, imparts a delicate malty sweetness and a nuanced depth of flavor that complements the turkey without overpowering it. This subtle enhancement adds a layer of sophistication you won't find in an un-brined or water-brined bird.
- Aromatic Contribution: When combined with aromatics like garlic and fresh herbs, the beer acts as a fantastic carrier, helping these flavors penetrate deep into the meat, creating a harmonious and savory profile throughout.
This process ensures that your turkey isn't just cooked; it's permeated with flavor and moisture from the inside out, setting the stage for that glorious crispy skin.
Crafting Your Perfect Beer Brine: Ingredients & Ratios
A successful beer brine starts with choosing the right ingredients. While the concept is simple, the quality and type of each component can significantly impact the final flavor profile of your crispy beer roast turkey recipe.
Choosing the Right Beer
The star of the show, beer, needs careful selection. For brining, we aim for balance and enhancement, not dominance.
- Lager: This is the ideal choice. Lagers offer a mild malt sweetness and a clean finish that enhances the turkey without introducing strong, potentially clashing flavors. Think standard pilsners or light lagers.
- Light Ales: Similar to lagers, light ales can also work well, offering a slightly fruitier or nuttier note if you prefer.
- What to Avoid: Steer clear of heavily hopped beers like IPAs, dark stouts, or intensely flavored porters. Their strong bitterness, roasted notes, or heavy sweetness can easily overpower the delicate flavor of the turkey, leading to an undesirable result.
Essential Aromatics and Herbs
These ingredients are crucial for infusing savory depth and fresh aroma into your turkey:
- Garlic: Crushed cloves release a bold, aromatic punch that permeates the meat. Don't be shy; a generous amount ensures deep savory notes.
- Fresh Herbs: A classic trio of thyme, rosemary, and parsley brings earthy fragrance and a bright, fresh balance to the richness of the meat. These herbs also contribute beautiful aromatics to your kitchen as the turkey roasts.
- Salt: Essential for the brining process, helping the meat retain moisture. Kosher salt is often preferred for its larger crystals and ease of measurement, but sea salt works too.
- Stock Powder (or Liquid Stock): While optional, adding a little stock powder or replacing some of the beer with liquid chicken or vegetable stock can enrich the overall savoriness of the brine, deepening the umami flavor.
- Optional Additions: Consider a few bay leaves for herbal complexity, or a spoonful of black peppercorns for a gentle warmth.
The Roasting Revelation: Achieving That Ultimate Crispy Skin
Once your turkey has enjoyed its beer bath, the roasting process is where the magic of crispiness happens. This method combines initial covered roasting with high heat and a final broil to deliver that coveted golden, crackling skin.
From Brine to Broiler: The Cooking Process Unveiled
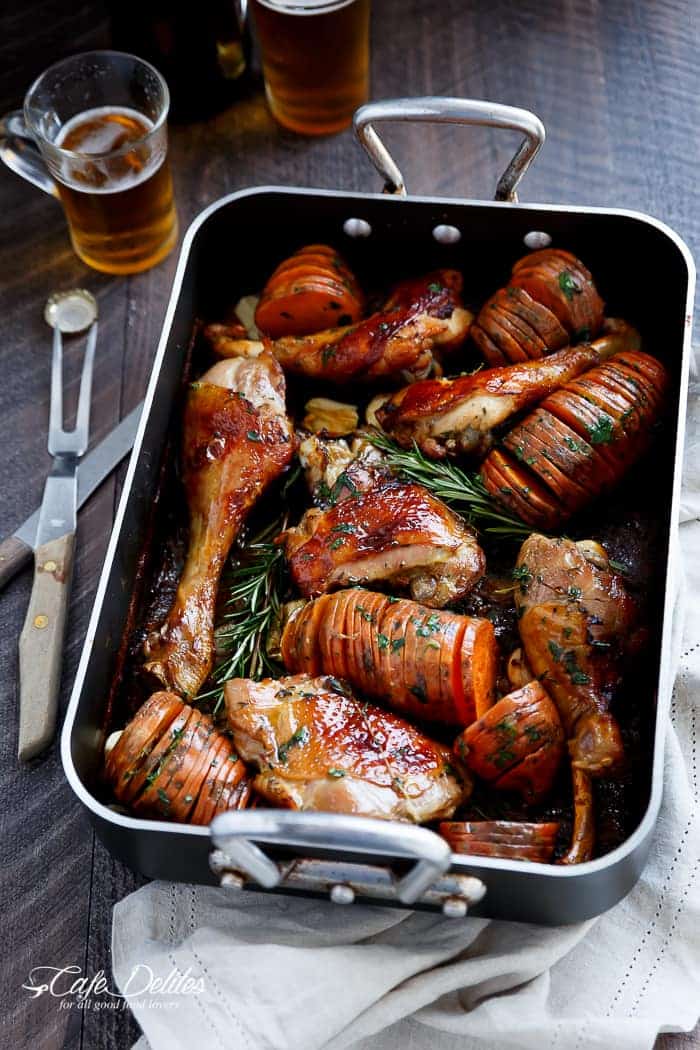
- Prep the Turkey Pieces: If using turkey drumsticks and thighs (which this method is fantastic for, yielding incredibly juicy dark meat), place them in a large baking dish. Crucially, pat the turkey pieces thoroughly dry with paper towels. This step cannot be overstated, as excess moisture prevents crisping. You can also pierce shallow slits into the skin. This not only helps the brine soak in more effectively but also allows fat to render out, contributing to a crispier finish.
- Make the Brine: In a bowl, combine your chosen beer, crushed garlic, stock powder (if using), and salt. Stir until the salt is dissolved. Pour this aromatic beer brine over the turkey pieces in the baking dish. Turn the turkey skin-side down initially to ensure even coating.
- Refrigerate and Soak: Cover the dish with foil and refrigerate for 4 to 6 hours. For an even deeper flavor infusion, you can brine overnight (up to 12 hours is generally safe for turkey pieces, but be mindful not to over-brine, which can make the meat too salty or mushy). Remember to rotate the turkey pieces halfway through brining to ensure all parts get ample exposure to the delicious brine.
- Preheat the Oven: When you're ready to cook, preheat your oven to a robust 200°C (390°F). High heat is key for crispy skin and efficient cooking.
- Initial Roast (Sealed for Juiciness): Drain off approximately half of the marinade, leaving the rest in the baking dish. This remaining liquid will create a steamy environment, keeping the turkey incredibly moist during the initial cooking phase. Cover the dish tightly with foil, sealing the sides to trap the steam. Roast in the preheated oven for about 1 hour, or until the turkey pieces are mostly cooked through.
- Uncover and Rotate (For Even Browning): Carefully remove the foil. The turkey should already look somewhat cooked and lightly golden. With tongs or a spatula, carefully turn each piece of turkey. This helps the skin roast evenly and begin its journey to ultimate crispiness.
- Broil to Crisp (The Final Touch): Increase the oven temperature to the broil (or grill) setting on medium-high. Keep a close eye on the turkey! Broiling is a fast process. Allow the skin to turn beautifully golden brown and become irresistibly crispy. This usually takes only 5-10 minutes. Watch constantly to prevent burning.
Once removed from the oven, let the turkey rest for a few minutes before serving. This allows the juices to redistribute, ensuring every bite is as moist as possible.
Pro Tips for a Flawless Crispy Beer Roast Turkey Recipe
Achieving perfection with your crispy beer roast turkey recipe is simple with a few expert insights:
- Don't Over-Brine: While brining is fantastic, too much time can make the turkey overly salty or give it a somewhat spongy texture. Stick to the recommended times for best results.
- Pat Dry, Then Pat Dry Again: This cannot be emphasized enough! Moisture is the enemy of crispy skin. After removing from the brine, ensure the turkey pieces are as dry as possible. For an even crispier result, you can even let them air-dry, uncovered, in the refrigerator for an hour or two before roasting.
- Rest Your Turkey: After cooking, always allow the turkey to rest for at least 10-15 minutes (longer for a whole bird). This allows the juices, which have gathered at the center during cooking, to redistribute throughout the meat, making every slice tender and succulent.
- Use a Meat Thermometer: For food safety and optimal doneness, always check the internal temperature of the thickest part of the turkey (without touching bone). Turkey is safely cooked at 74°C (165°F).
- Consider a Roasting Rack: If you're roasting a whole turkey or larger pieces, placing them on a rack within the roasting pan lifts them out of the drippings. This promotes better air circulation around the skin, leading to a crispier result all around.
- Adapting for a Whole Turkey: While this recipe focuses on pieces, the beer brine principle applies beautifully to a whole bird. You'll need a much larger container and significantly more brine (adjusting ratios proportionately). Brining a whole turkey might take 12-24 hours. For more guidance on whole birds, check out Crispy Beer Roast Turkey: Your Guide to Juicy Perfection.
- Holiday Feasts: This method is particularly well-suited for holiday gatherings. The depth of flavor from the beer brine and the impressive crispy skin will make your holiday meal truly stand out. Explore more holiday-specific tips at Holiday Beer Roast Turkey: Impress with Crispy & Moist Meat.
The crispy beer roast turkey recipe is an absolute winner, delivering on its promise of perfectly juicy meat and that coveted golden, crackling skin. By combining the tenderizing and flavor-infusing power of a beer brine with the strategic application of high heat, you can conquer any turkey-roasting fears and serve a dish that will be remembered long after the last bite. So, whether it's for a special occasion or just a fantastic Sunday dinner, grab your favorite lager and get ready to impress!
